Kivy 画面をスクロールさせる(Python Kivyの取説・使い方 第8回)
画面をスクロールさせる方法
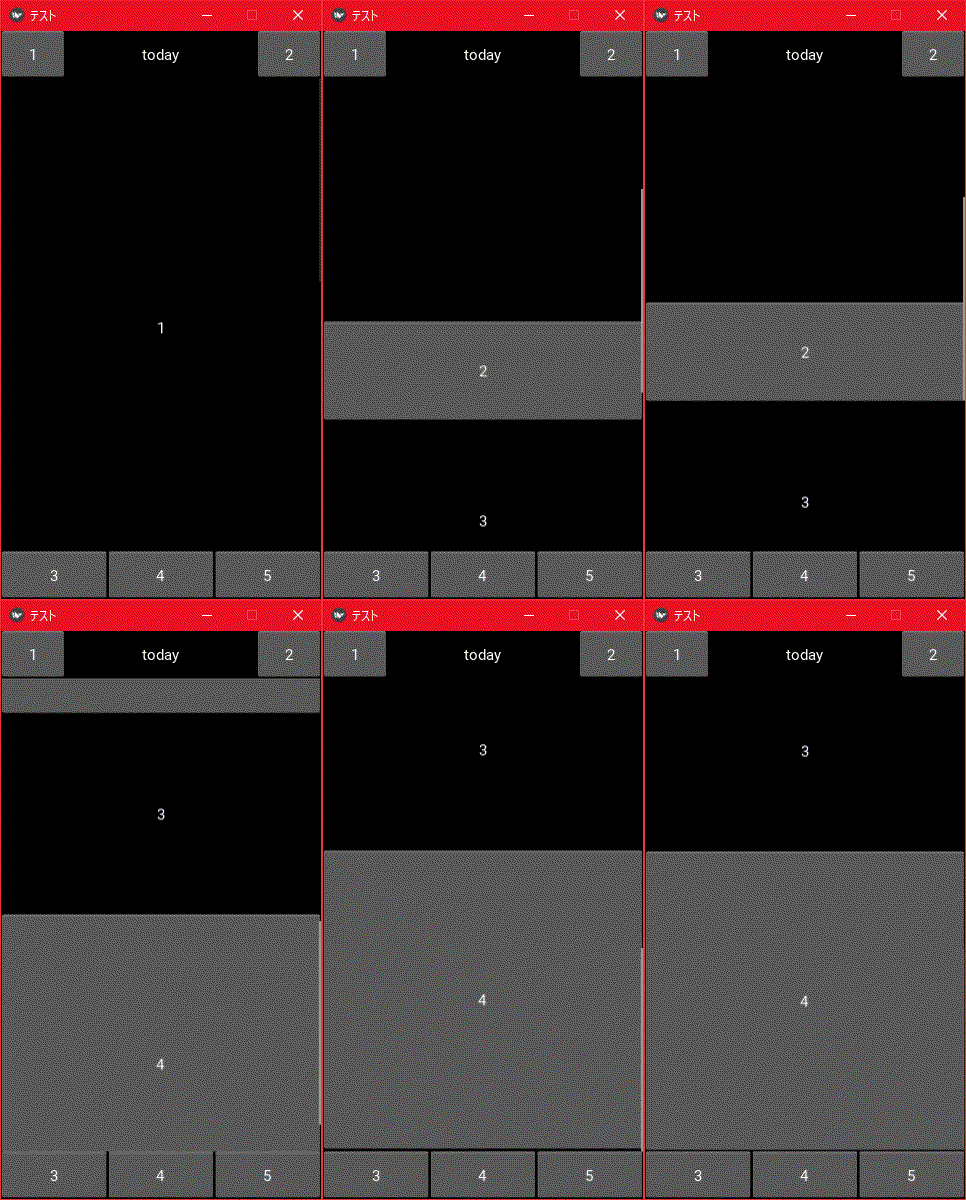
今回は画面スクロールを作ってみます。ScrollView(ウェジットの1つ)を使います。

プログラムのコード
# フル画面を解除して画面の幅と高さを設定
from kivy.config import Config
Config.set('graphics', 'fullscreen', 0)
Config.set('graphics', 'width', 320)
Config.set('graphics', 'height', 568)
Config.set('graphics', 'resizable', 0)

from kivy.app import App
from kivy.uix.boxlayout import BoxLayout
from kivy.uix.widget import Widget


class MainScreen(BoxLayout):
    pass

class TestApp(App):
    def build(self):
        self.title = 'テスト'
        return MainScreen()

if __name__ == '__main__':
    TestApp().run()
kvファイル(test.kv)
<MainScreen>:
    BoxLayout:
        orientation: "vertical"

        BoxLayout:
            Button:
                size_hint_x: 0.2
                text: "1"
            Label:
                size_hint_x: 0.6
                text: "today"
            Button:
                size_hint_x: 0.2
                text: "2"

        ScrollView:
            size_hint_y: 10
            BoxLayout:
                size_hint_y: None
                orientation: "vertical"
                height: self.minimum_height
                Label:
                    size_hint_y: None
                    text: "1"
                    height: 500
                Button:
                    size_hint_y: None
                    text: "2"
                Label:
                    size_hint_y: None
                    text: "3"
                    height: 200
                Button:
                    size_hint_y: None
                    text: "4"
                    height: 300

        BoxLayout:
            Button:
                text: "3"
            Button:
                text: "4"
            Button:
                text: "5"
解説
ScrollView
親のsize_hint(xまたはy)を無効にしてすべての子の合計が画面の大きさ以上にするか、親のsize_hint(xまたはy)を「1」以上にするとスクロール可能になります。
minimum_height
すべての子を含めるために必要な自動計算された最小の高さです。つまりラベルやボタンの高さの合計になります。
kvファイルだけを編集して横スクロールにしてみます。
<MainScreen>:
    BoxLayout:
        orientation: "vertical"

        BoxLayout:
            Button:
                size_hint_x: 0.2
                text: "1"
            Label:
                size_hint_x: 0.6
                text: "today"
            Button:
                size_hint_x: 0.2
                text: "2"

        ScrollView:
            size_hint_y: 10
            BoxLayout:
                size_hint_x: None
                width: self.minimum_width
                Label:
                    size_hint_x: None
                    text: "1"
                    width: 500
                Button:
                    size_hint_x: None
                    text: "2"
                Label:
                    size_hint_x: None
                    text: "3"
                    width: 200
                Button:
                    size_hint_x: None
                    text: "4"
                    width: 300

        BoxLayout:
            Button:
                text: "3"
            Button:
                text: "4"
            Button:
                text: "5"

最初に親のsize_hintを「1」以上にしてしまった方がわかりやすくてきれいな気がしますが、項目が増えてスクロールする必要がある場合にはこちらは適していません。
<MainScreen>:
    BoxLayout:
        orientation: "vertical"

        BoxLayout:
            Button:
                size_hint_x: 0.2
                text: "1"
            Label:
                size_hint_x: 0.6
                text: "today"
            Button:
                size_hint_x: 0.2
                text: "2"

        ScrollView:
            size_hint_y: 10
            BoxLayout:
                size_hint_y: 2
                orientation: "vertical"
                Label:
                    size_hint_y: 0.4
                    text: "1"
                Button:
                    size_hint_y: 0.1
                    text: "2"
                Label:
                    size_hint_y: 0.2
                    text: "3"
                Button:
                    size_hint_y: 0.3
                    text: "4"

        BoxLayout:
            Button:
                text: "3"
            Button:
                text: "4"
            Button:
                text: "5"
次回は画面のスライドを作りたいと思います。
保存ファイル
lesson60.py
test.kv
文責:Luke