Flask ボタンの大きさや位置を変更する(ボタンでページ移動する)
はじめに
今回から「Flask」の基本を勉強していきます。「html」「css」「javascript」の知識が必要になってきます。
まずは基本的なwebページを作ってみます。次にボタンを作ります。
動作環境
Windows10
Python 3.7.5
Flask 1.1.1
作業フォルダ/
├─ templates/
│    └─ index.html
├─ static/
│    ├─ index.css
│    └─ index.js
└─ test.py
htmlファイルを保存するフォルダ名は「templates」でないといけません。また、CSSファイルとJavaScriptファイルを保存するフォルダ名は「static」でないといけません。
コード
test.py
from flask import Flask, render_template

app = Flask(__name__)


@app.route('/')
def index():
    return render_template('index.html')


if __name__ == '__main__':
    app.run()
index.html
<!DOCTYPE html>
<html lang="ja">
  <head>
    <link rel="stylesheet" href="{{url_for('static', filename='index.css')}}">
    <script src="{{url_for('static', filename='index.js')}}"></script>
  </head>
  <body>

    <h1>Hello</h1>
    <h2 id='test'>World</h2>

  </body>
</html>
index.css
h1 {
  color: red;
}
index.js
window.onload = function() {
  var e = document.getElementById('test');

  e.style.color = 'blue';
}
解説
「html」「css」「javascript」に関してはまったく勉強してきていないので、今回はなんとなく、htmlでcssファイル名とjavascript名を指定して、cssで文字を赤くしてjavascriptで文字を青くしてるなあ、くらいです。
render_template('index.html')
render_template関数でhtmlファイル名を指定して表示します。
test.pyを実行すると最後の行に下記が表示されます。
* Running on http://127.0.0.1:5000/ (Press CTRL+C to quit)
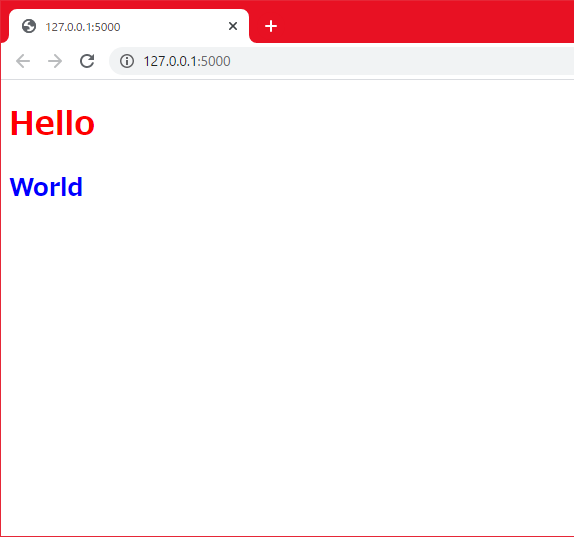
ブラウザに「http://127.0.0.1:5000/」を入力して開きます。

これで基本のwebページはできましたので、次はボタンを作成してみます。
作業フォルダ/
├─ templates/
│    ├─ index.html
│    └─ index2.html
├─ static/
│    ├─ index.css
│    └─ index.js
├─ test.py
└─ test2.py
「test2.py」と「index2.html」を新しく作っていきます。
コード
test2.py
from flask import Flask, render_template, request

app = Flask(__name__)


@app.route('/')
def index():
    return render_template('index2.html')


@app.route('/test', methods=['GET', 'POST'])
def test():
    if request.method == 'GET':
        res = request.args.get('get_button')
    elif request.method == 'POST':
        res = render_template('index.html')

    return res


if __name__ == '__main__':
    app.run()
index2.html
<!DOCTYPE html>
<html lang="ja">
  <head>
  </head>
  <body>

    <form action="/test" method="get">
      <button name="get_button" value="from get" style="width:200px;height:100px">get ボタン</button>
    </form>

    <div style="margin-left:10%;margin-right:10%;">
      <form action="/test" method="post">
        <button name="post_button" style="width: 100%; padding: 10px;">post ボタン</button>
      </form>
    </div>

  </body>
</html>
解説
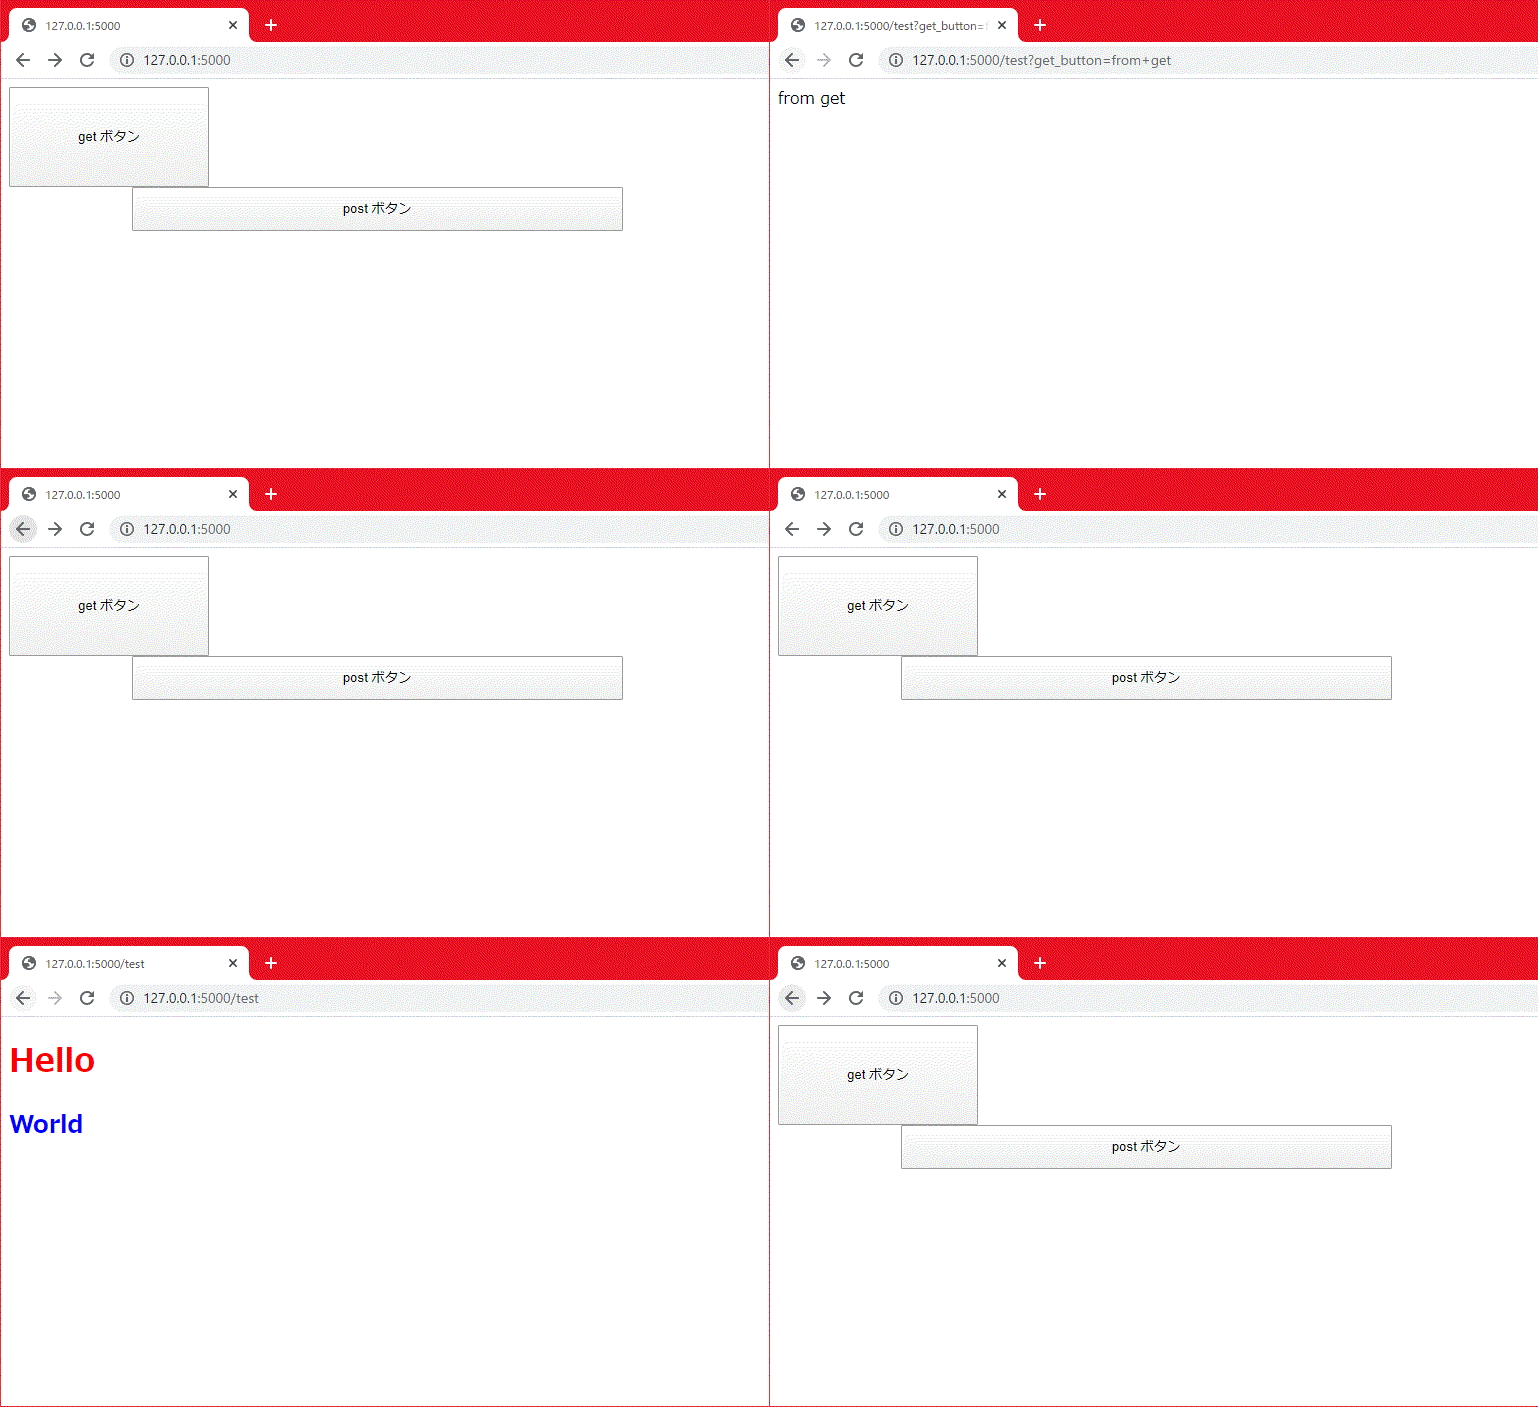
test2.pyを実行してブラウザ(127.0.0.1:5000)を表示すると2つのボタンが表示されます。「get ボタン」を押すと「from get」の文字が表示されます。「post ボタン」を押すとはじめに作った「index.htmlのページ」が表示されます。GETとPOSTの違いについては、まだ説明できる知識がないので次の機会にします。
res = request.args.get('get_button')
getから値を取得するには、request.args.get関数を使います。(postから値を取得する場合は、request.form関数を使います。)
ボタンの大きさ
「get ボタン」・・今回はhtmlファイルで設定しています。
「style="width:200px;height:100px"」この場合は大きさは固定で単位はピクセル数です。
「post ボタン」・・今回はhtmlファイルで設定しています。
「<div style="margin-left:10%;margin-right:10%;">」で画面の幅に合わせて左右10%を空白にします。「style="width: 100%; padding: 10px;"」さきほど空白にした範囲以外の幅100%で表示します。「padding: 10px」文字の上下左右すべてに10ピクセルの余白ができます。

まとめ
Flaskを使って文字を表示するから始まり、webページを表示、ボタンの作成、ボタンから文字を取得とページを移動するまで出来ました。ここまではホームページを作成している感じです。また今回からPythonよりweb作成(htmlやcss)の勉強が必要になってきました。
次回からはPythonを利用したweb作成をしたいと思いますが、まだまだ勉強することが多いです。
「PythonAnywhere」にも公開できましたのでこちらから動作確認も出来ます。
http://startpython.pythonanywhere.com
(1つしか公開できないので別のものに変わってしまう場合があります)
こちらのサイトを参考にさせていただきました。
python.zombie-hunting-club.com
↓よかったらポチッとしていってください。